Hey everyone!
Just wanted to let you know that I’m now blogging under my own domain! Come on over to Chocolate Fingerprints, where I’ll be posting from now on. 😀 Remember, that’s chocolatefingerprints.net, not.com! Got it? Great!
October 4, 2008
Hey everyone!
Just wanted to let you know that I’m now blogging under my own domain! Come on over to Chocolate Fingerprints, where I’ll be posting from now on. 😀 Remember, that’s chocolatefingerprints.net, not.com! Got it? Great!
October 2, 2008
Do you love the taste of apple desserts, but don’t have the time, energy, or motivation to pull off a full-blown pie or dumplings? Try apple crisp! All you have to know how to do is peel, measure, stir, and heat up an oven. It’s incredibly delicious, too! Read below for my favorite apple crisp recipe of all time. It’s the one my husband’s grandma makes!

Applescotch Crisp
Crisp Ingredients:
Topping Ingredients:
Directions:
Makes 8-9 Servings.
It really is delish! I love it best with a little bit of vanilla ice cream! Enjoy!
October 2, 2008
![]()


I grew up with Spot Shot carpet cleaner. My step-dad, whose mantra should be “Save money or die,” very rarely endorses a brand name product. He would much rather stick to the cheaper generic alternatives, whenever possible. However, when he finds a brand name product that outshines any other similar products on the market, he sticks with it for life, and will use nothing else. Plus, he recommends it to everyone he knows! The original Spot Shot carpet cleaner has long been one of these much-lauded brands. When I was growing up, I was taught that no other carpet cleaner would stand up to the job, and I might as well be throwing my money away if I used anything else. That’s how passionate he is when he chooses to back a brand name!
The one, huge drawback to Spot Shot Original–the thing has caused me to avoid purchasing it for my entire adult life–is the odor. The fumes from my step-dad’s beloved Spot Shot could practically set a person’s nose hairs on fire! I’m not kidding! With such potent fumes, I didn’t feel comfortable using the product around my children or pets. To my way of thinking, anything with fumes that harsh can’t be non-toxic, right? I had to make due with alternative products, some baking soda and vinegar, and a whole lot of elbow grease. That method works okay, but it’s not nearly as easy or efficient as the Spot Shot I used when I was a girl.
That’s why I was thrilled when MomCentral and Wd-40 offered to send me a Spot Shot demo kit, so I could test out the new and improved, non-toxic (YES, I said non-toxic) and environmentally friendly (YES, I said environmentally friendly) Spot Shot. I couldn’t wait to try it! The million dollar question was, of course, would it work as well as the old, fume-laden Spot Shot?
I received my Spot Shot demo kit in the mail. It was really cool, by the way, including a small carpet square, and bottles of amonia and chocolate to dump on said square. With my kids at a safe distance, I slathered the square with the amonia and chocolate sauce. Here’s what it looked like:

If I had a stinky, smelly mess like that on my living room carpet, I’d be extremely peeved, to say the least! After messing up the carpet square, I was supposed to spray the new Spot Shot on the stain and ammonia, then blot with a rag (also provided in the kit!). Then I was supposed to spray and blot, spray and blot, etc, until the stain and odor were gone. In less than five minutes, with absolutely no scrubbing, I had one very wet, spotlessly clean, totally odorless carpet square! Here’s what it looked like:

My son, who watched the proceedings very carefully, simply said, “COOL!” and I have to agree! I was amazed! Not only does the new Spot Shot work just as well as the original, but it has almost no odor at all! I’m hooked on the new, environmentally friendly, non-toxic Spot Shot, and I believe in it as firmly as my step-dad always has believed in the old version. Sorry, Rich, but it looks like a new best carpet cleaner has come to town!

October 1, 2008
Check out this video:
And this one:
Thanks to the One2One Network, I received a copy of Melee’s new cd, Devils & Angels. Not only are these guys really, really cute, but they’re incredibly talented! They write their own music, which is rare these days, and I really liked the cd. The music is rockin’, without being anrgry, but it’s not lite and sleepy, either. Watch the video above to see what I’m talking about. No swear words, either, which makes a huge difference when young kids are around!
When I got the cd to review, I honestly didn’t think I’d care for it too much. Now, after listening to it only a couple of times, I have to admit that I’m a fan! I think that Melee is a band to watch, and I expect great things from them! Angels & Devils is in stores now. You can buy it right this instant on Amazon. I highly recommend this cd!
October 1, 2008
As I mentioned earlier, we attended a family reunion recently. While there, my kids had the chance to play with some of their terribly cute cousins. Here’s my son, with his cousin, Kate, who is even cuter than she looks in the pictures. She’s always smiling with her little dimples! :

Brynleigh didn’t play much, because she’s only a month old, but my daughter is just head-over-heels in love with her! She follows my sister and Brynleigh around like a shadow. It’s so cute! Brynleigh’s great big brother, Maddox, is in the background:

Here’s another shot of these sweet siblings:

And here’s what my daughter was doing at her great-grandparents’ house, most of the time (whenever she wasn’t following the baby around):

Link up if you wish, and don’t forget to leave a comment!
September 30, 2008

Thanks to Family Review Network, I recently had the opportunity to order and review a costume from HalloweenPartyStore.com. Honestly, the hardest thing about this review was choosing a costume! This website has quite a wide selection of Halloween costumes, and I felt a bit like a kid in a candy store, imagining my children dressing up in each one of these cool outfits. My daughter wanted everything, and my son is still hoping for a werewolf costume (unfortunately, they don’t have that one), so I decided to get my daughter the Tinkerbell Ballerina Halloween Costume. It’s sooooooooooooo cute!!
The prices at HalloweenPartyStore.com are very reasonable, and the costume arrived in the mail in good shape, less than a week after I ordered it, and my little girl had to try it on immediately of course! She loves the costume, and was so excited that she wouldn’t quite stand still to have her picture taken:

Every year, it’s the same story for my family. We rush around the week (okay I admit it: sometimes the day) before Halloween, dragging ourselves from store to store, until our kids find a costume that’s “just right.” That’s why this year, I’ve vowed to buy my costumes online. Buying this Tinkerbell costume was completely painless, effortless, and actually fun! What a far cry from the Halloween shopping I’ve become accustomed to! Check out HalloweenPartyStore.com. Maybe you’ll find your child the perfect costume in the comfort of your own living room!
September 30, 2008


This tackle has been a very, very, very long time coming! Approximately four years ago, my husband’s grandma gave me some old clothes that had sentimental value to her, and asked me to make a quilt out of them. I had already made a couple of baby quilts, and I figured it couldn’t be too hard. I didn’t count on getting pregnant, having a miscarriage, getting pregnant again, and then moving across the state! All that stuff happened within six months of my starting the quilt, and it kept getting put away to finish later. Then, my sewing machine was packed away, too when my daughter was born. It didn’t see the light of day again until earlier this year! Now, I sew so much that I can’t believe I ever did without my sewing machine!
This spring, when I unpacked all the quilt pieces I’d cut (surprisingly, I managed to save every one, and even a few extras), I was astonished to realize that the quilt was more than half finished! In the midst of an early pregnancy and horrible morning sickness, the quilt had seemed impossible, like something I’d never in a million years be able to finish. I’m happy to say that wasn’t true! With a little help and advice from my mom about backing and binding, I was able to finish the quilt in time for our visit to my husband’s grandparents’ house last week! I was so thrilled, and my husband’s grandma was pretty flabbergasted, in a good way. I think she’d given up hope for the quilt to be finished, too. She’s the sweetest lady ever, and it felt so nice to be able to make her so happy! 🙂 Here she is, opening the long-awaited quilt:

September 29, 2008

I’m finally back from my family reunion, with another Etsy shop to feature. One look at this shop, and I know you’ll fall in love with it, just like I did! Zerumpees offers “unique, handmade plush monsters,” and they’re so cute I wish I could reach through my computer screen and hug them all!
I think these monsters would be a great present for a child who “has everything.” What gift do you think they’ll remember more: another run-of-the-mill teddy bear, or a totally unique, handmade, friendly monster? It’s a no-brainer! I can also envision these monsters as a way to help little ones get over their fear of things that go bump in the night. After all, if you have a cuddly monster to hug and protect you, night time might not seem so scary anymore.
Here are just a few of the great items that Zerumpees has to offer:
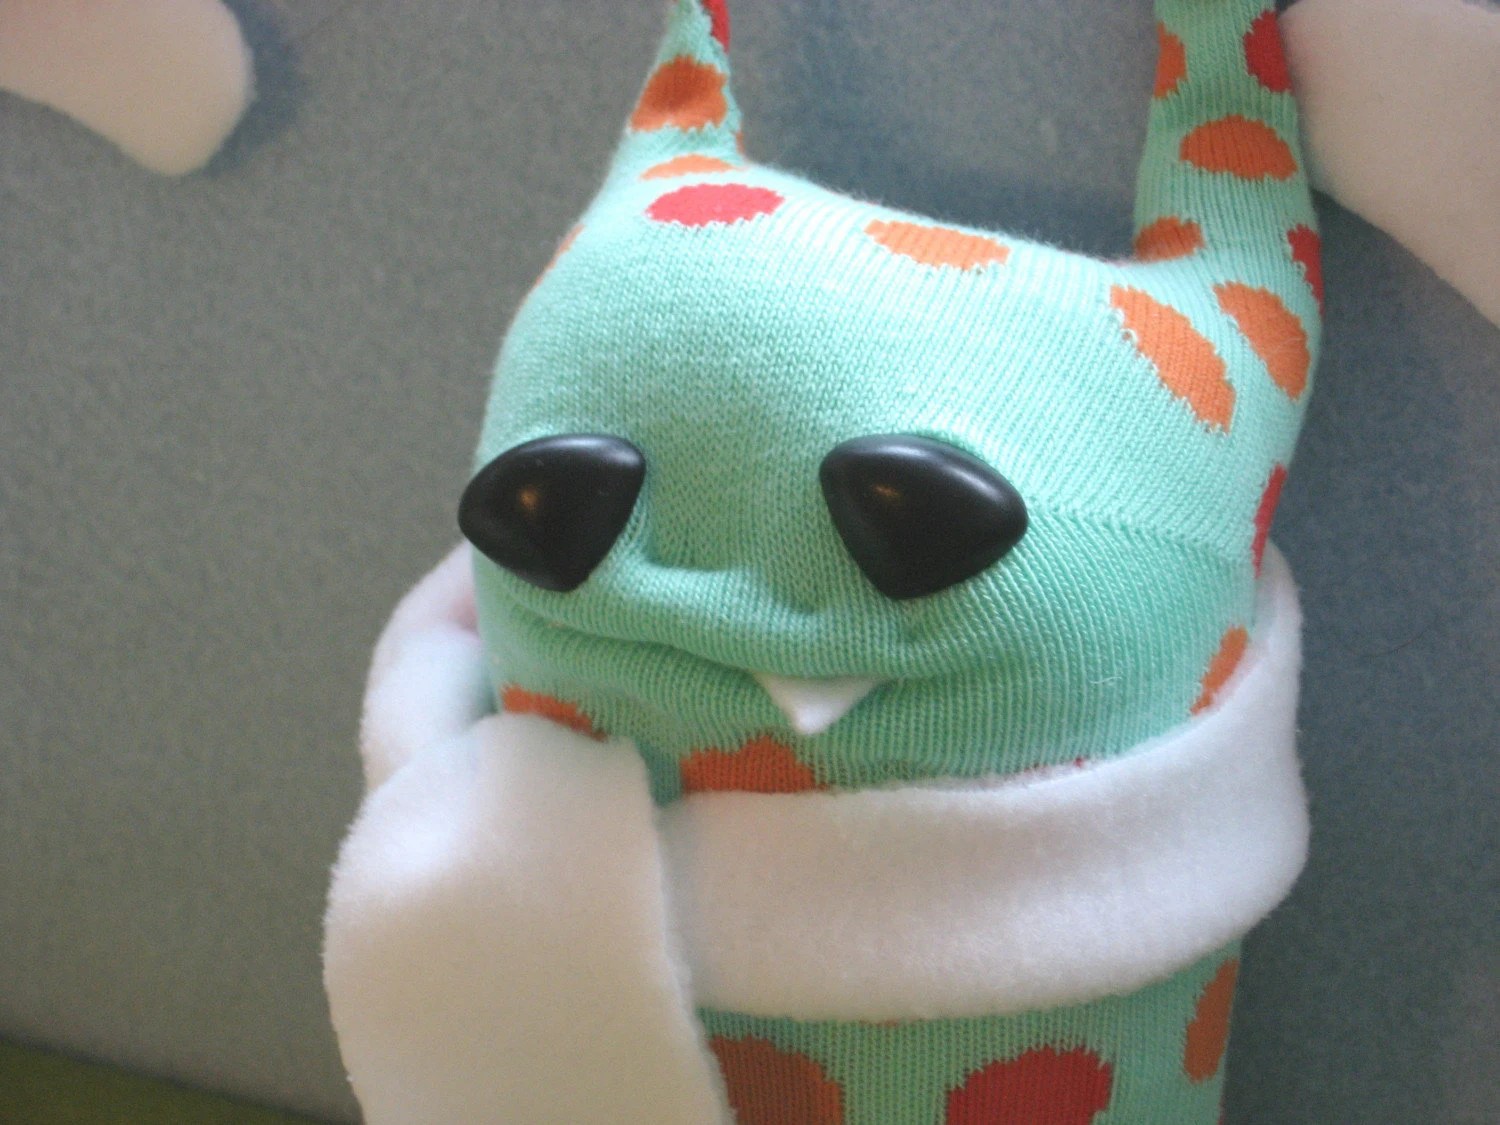


Run, don’t walk over to Zerumpees today, to read the terribly cute descriptions of these and other monsters, and to order yours today!
If you have an Etsy shop, or just love Etsy, why don’t you post about it, and link up below?
September 25, 2008

I discovered korkers a while back, but couldn’t figure out how to make these cute little hair accessories. Finally, I found Korkers and More. This site is a little rough, but it contins great basic directions for making a korker. Using those directions, and adding my own little twists (for example: attaching the bow to a ponytail holder instead of a barrette, according to my girl’s preferences), I have come up with a method that allows me to make korkers fairly easily. They’re a lot cheaper than any korkers you can buy online, and I can make customize them to suit me and my little girl.
Would you like to learn how to make a korker? Well, today is your lucky day! 🙂 Read below for step-by-step instructions.
You’ll Need:
Directions:


September 24, 2008


