
I’ve found that one of the most rewarding things in life is to successfully make something with your own two hands. The reward is even better when the end result is something that tastes great! Also as a parent, it’s extremely satisfying to make something wholesome and watch as your kids gobble it down. In this spirit, I share this gem of a recipe:
I modified this recipe from several others I’ve found. This is a great recipe to use when you want 100% whole wheat bread, but don’t have the time (or desire) to spend half an hour kneading. I’ve made it many times, with great results!
100% Whole Wheat Bread Machine Bread
- 1 1/4 cups milk, warmed in the microwave to 90-100 degrees Farenheit.
- 2 Tbsp. oil
- 2 Tbsp. honey (can substitute brown sugar)
- 2 tsp. salt (I prefer Kosher)
- 2 3/4 cups whole wheat flour (I used white whole wheat)
- 1/4 cup vital wheat gluten (found in baking aisle)
- 1 packet (1/4 ounce) quick-rise dry yeast
1. Combine the ingredients in the bread machine pan, in the order suggested by the manufacturer. Choose the whole wheat setting, and turn the machine on. If your machine doesn’t have a whole wheat setting, choose regular, and reset the machine after the initial kneading time.
2. In the middle of the kneading cycle, check the bread. You want the dough to form a nice ball, not mushy, not rock-hard. If it’s too dry, add a tablespoon of water and check again. Too wet? Add two teaspoons of flour at a time. Keep adding ingredients until a soft, but not mushy, ball is formed.
3. Check the dough about 10 minutes before the baking cycle begins. Don’t forget! Set a timer if you have to! If the dough has risen to the top of the pan, there’s a good chance it will deflate when it begins to bake. You can remedy this by slashing the dough: Wait until a minute or two BEFORE the baking cycle begins. Take a sharp, serrated knife (the kind you would cut bread with) and, using a steady hand, cut an “X” on top of the bread. After slashing here what the finished product looks like:
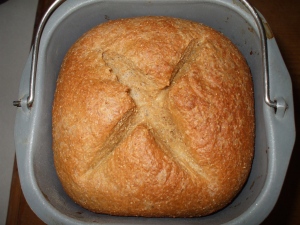
This bread can be sliced and devoured as soon as it leaves the bread pan, and it is exquisite that way! My kids and I made this recipe yesterday, and it was a hit, as usual!
Below is the finished product. Look really closely and you will see the steam rising off the freshly-cut slices.

My kids adore this bread, and it makes me feel good to know exactly what has been put into it. I know they are getting something really wholesome! They love it spread with butter and jam, and I’ve got the pictures to prove it!

With this bread, they actually eat the bread and the jam, instead of just licking the jam off the top!

Happy eating! If you try this recipe, please come back and tell me what you think of it!


